Before You Start
- You must be a Zoom Admin with access to group management.
- Verify that the teammates you plan to add have Licensed Zoom seats.
Create or Select a Zoom Group
-
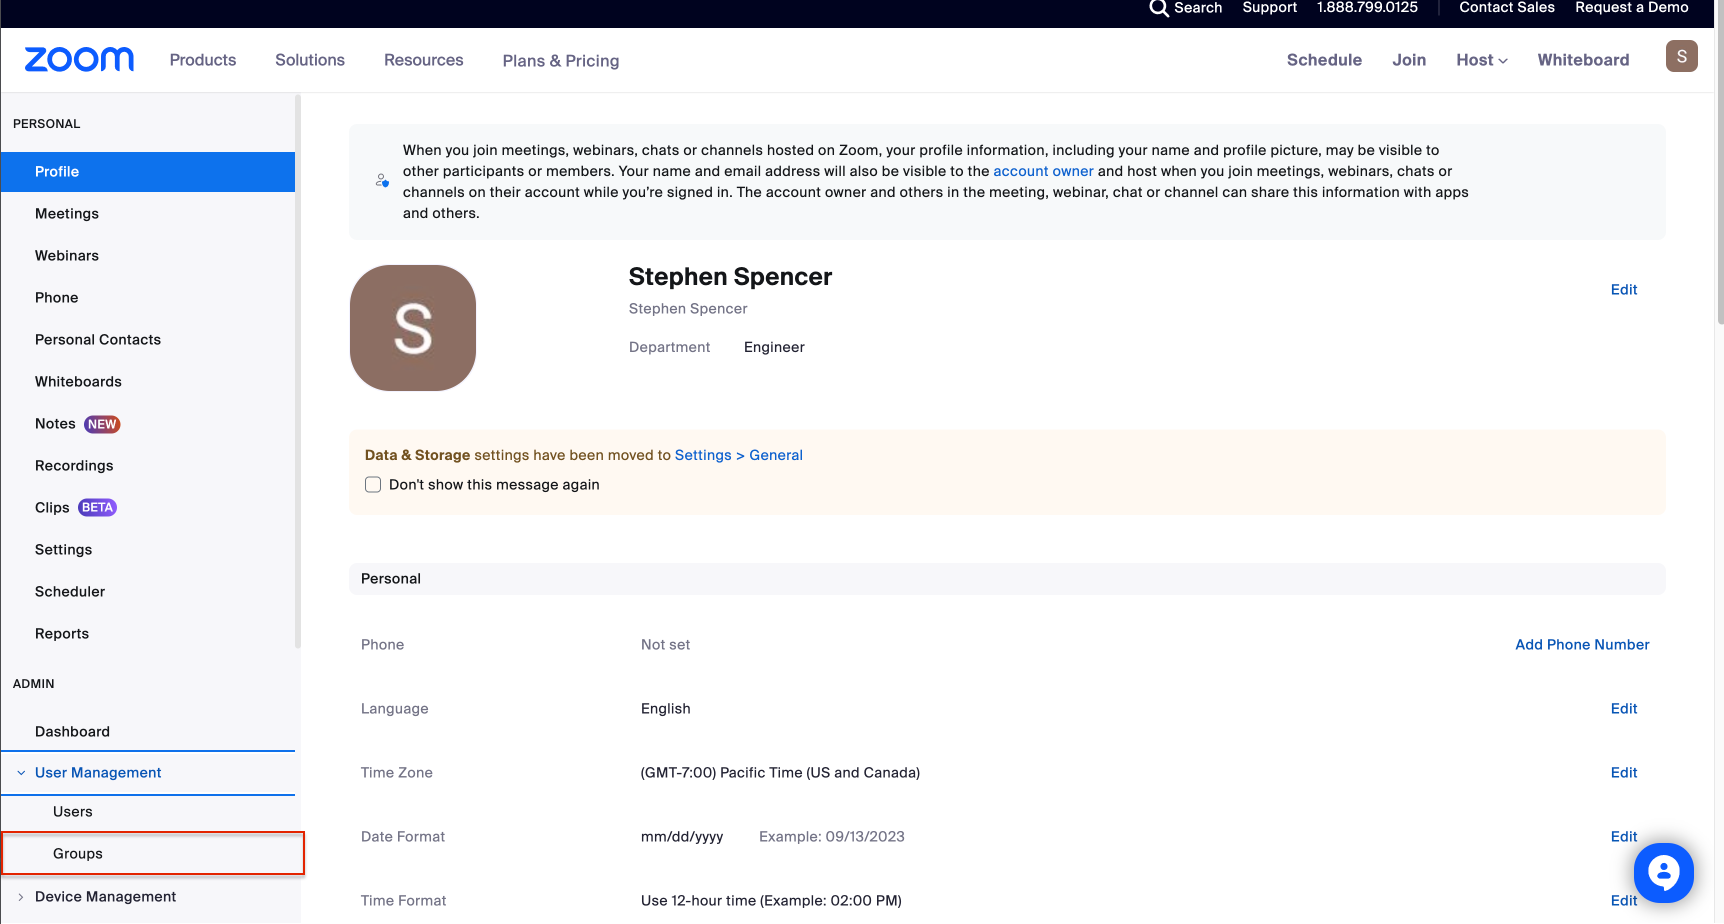
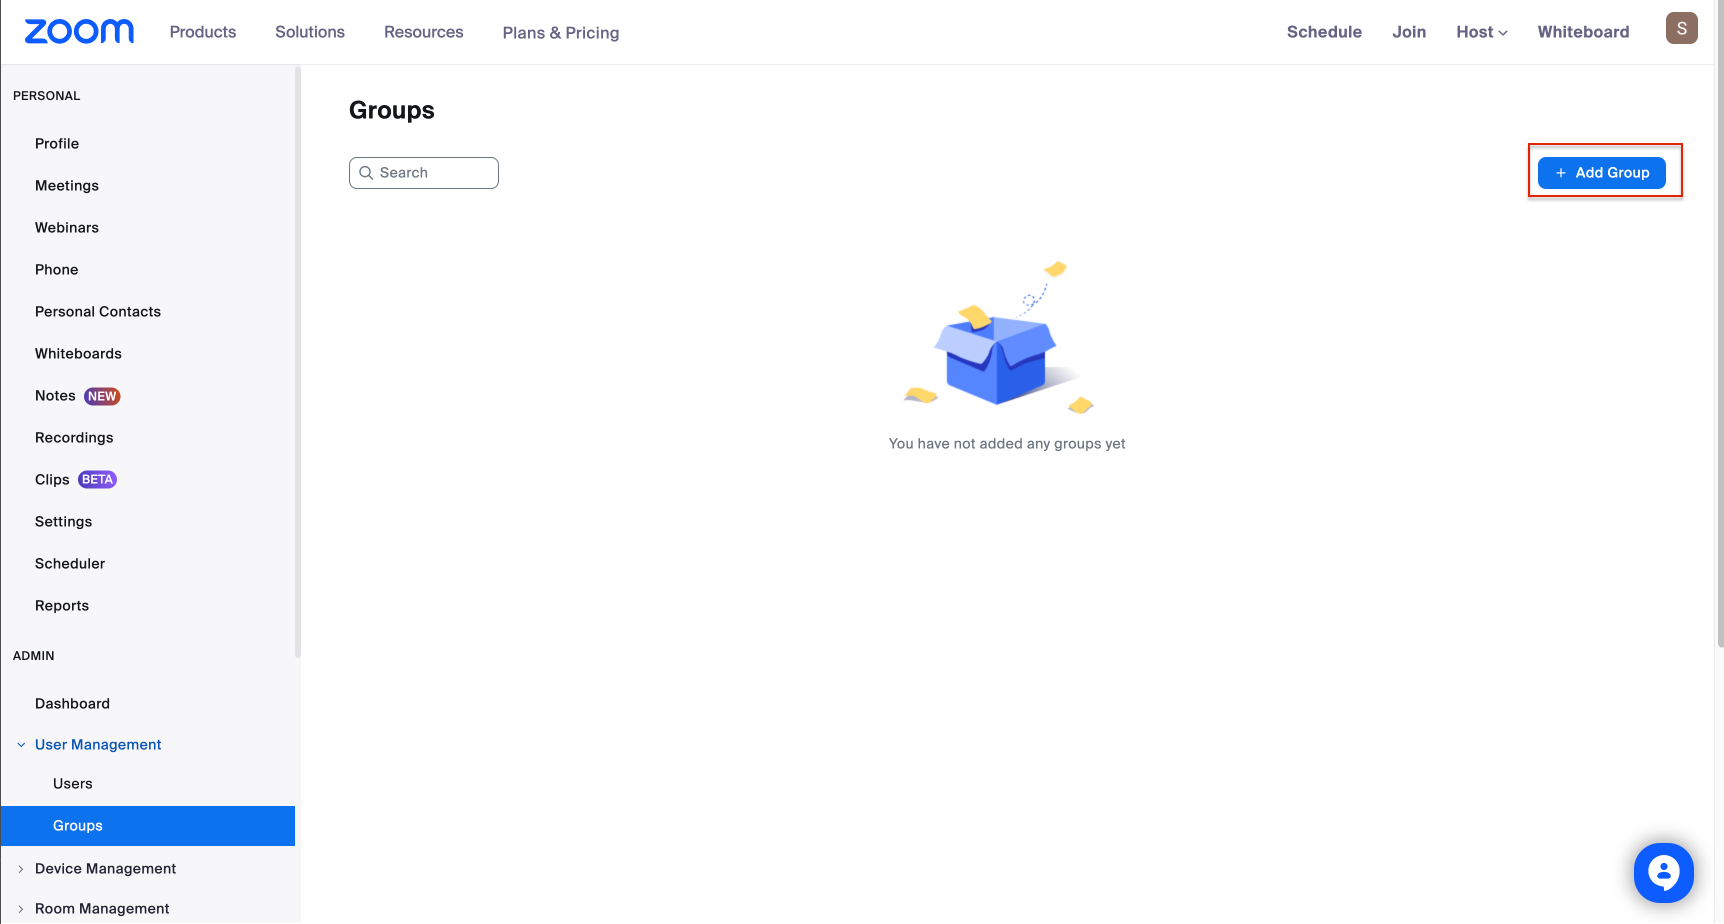
In the Zoom web portal, open User Management and choose Groups.
-
Use an existing group if it already contains the reps you want Momentum to analyze. Otherwise, click Add Group, name it, and save.
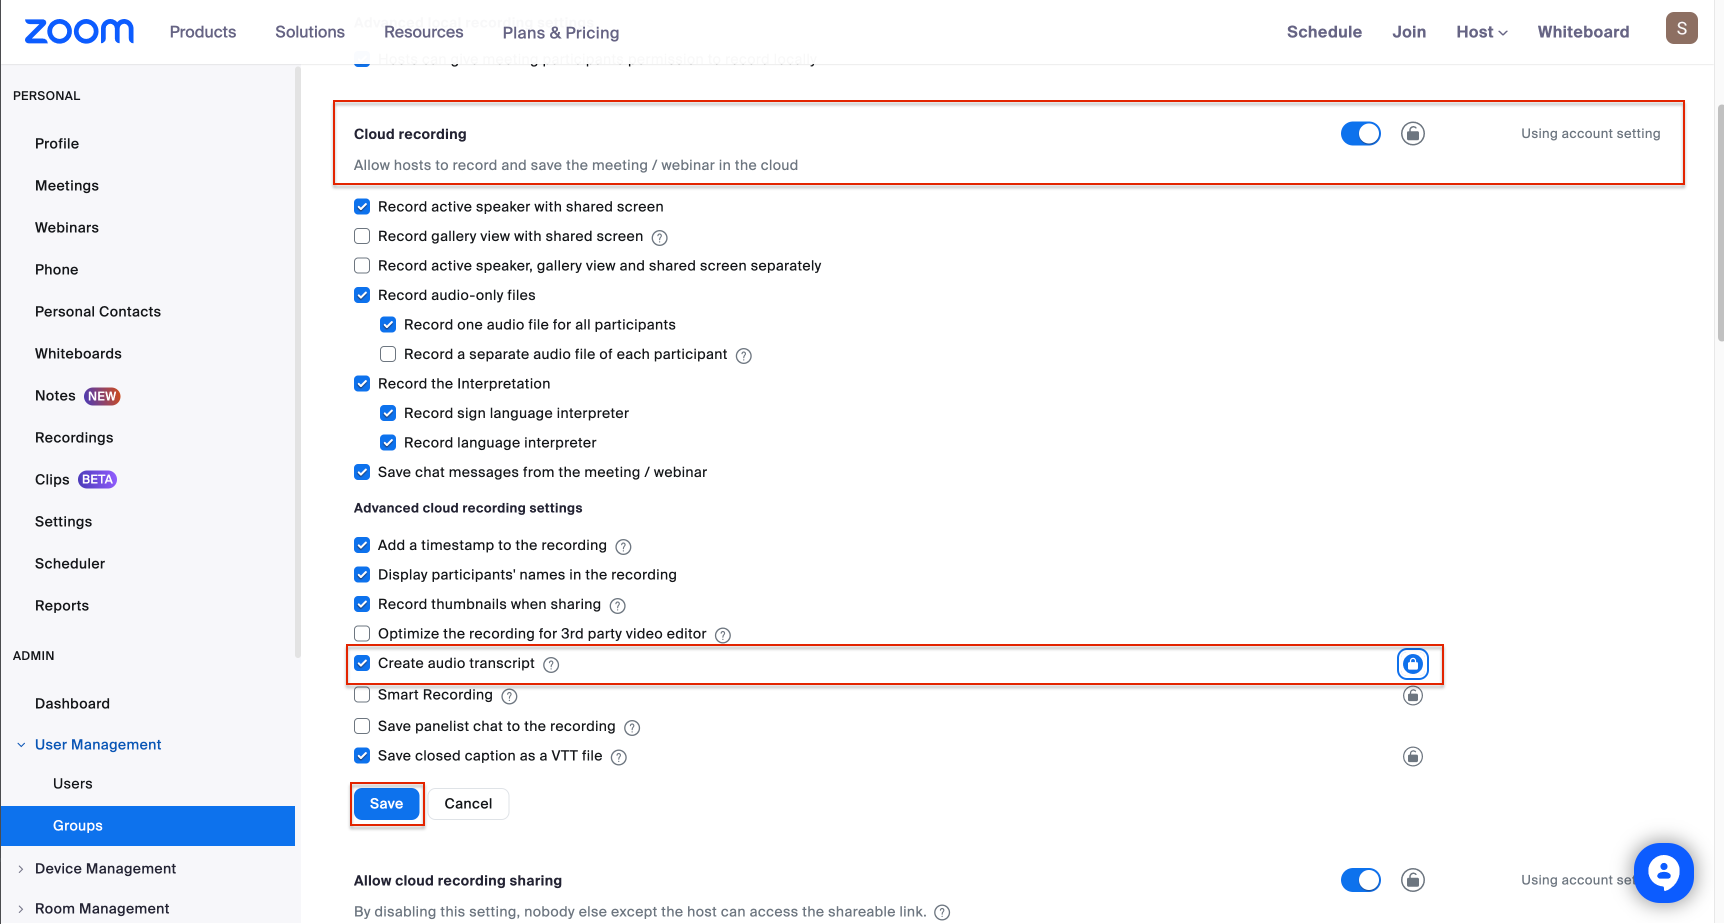
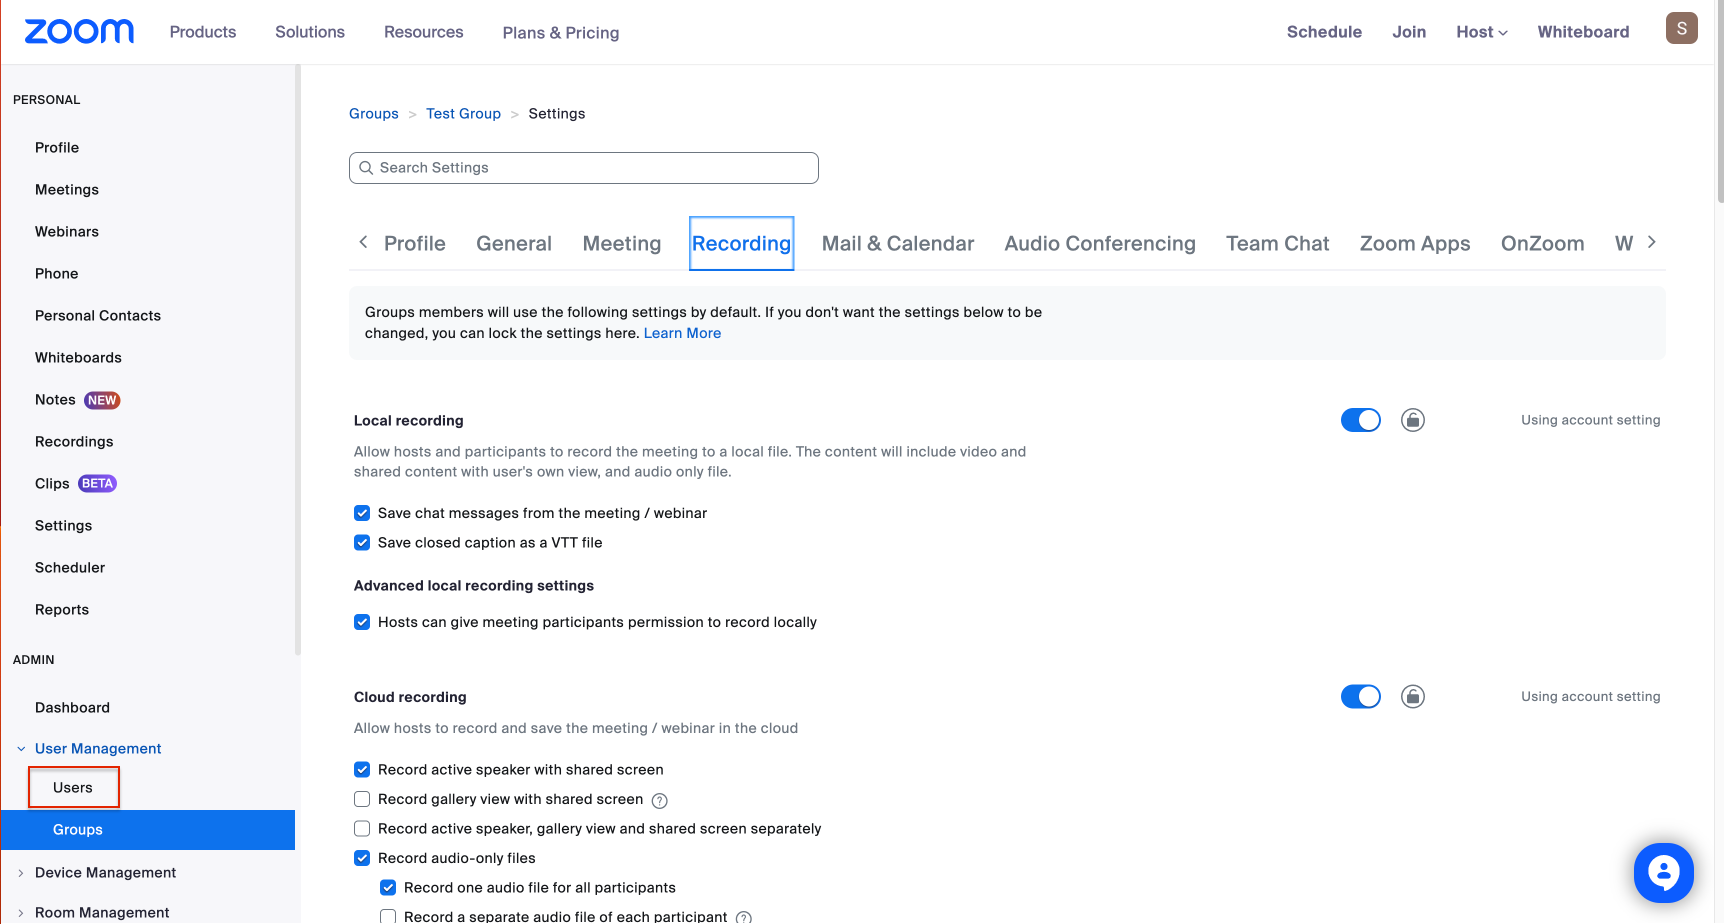
Configure Recording Defaults for the Group
-
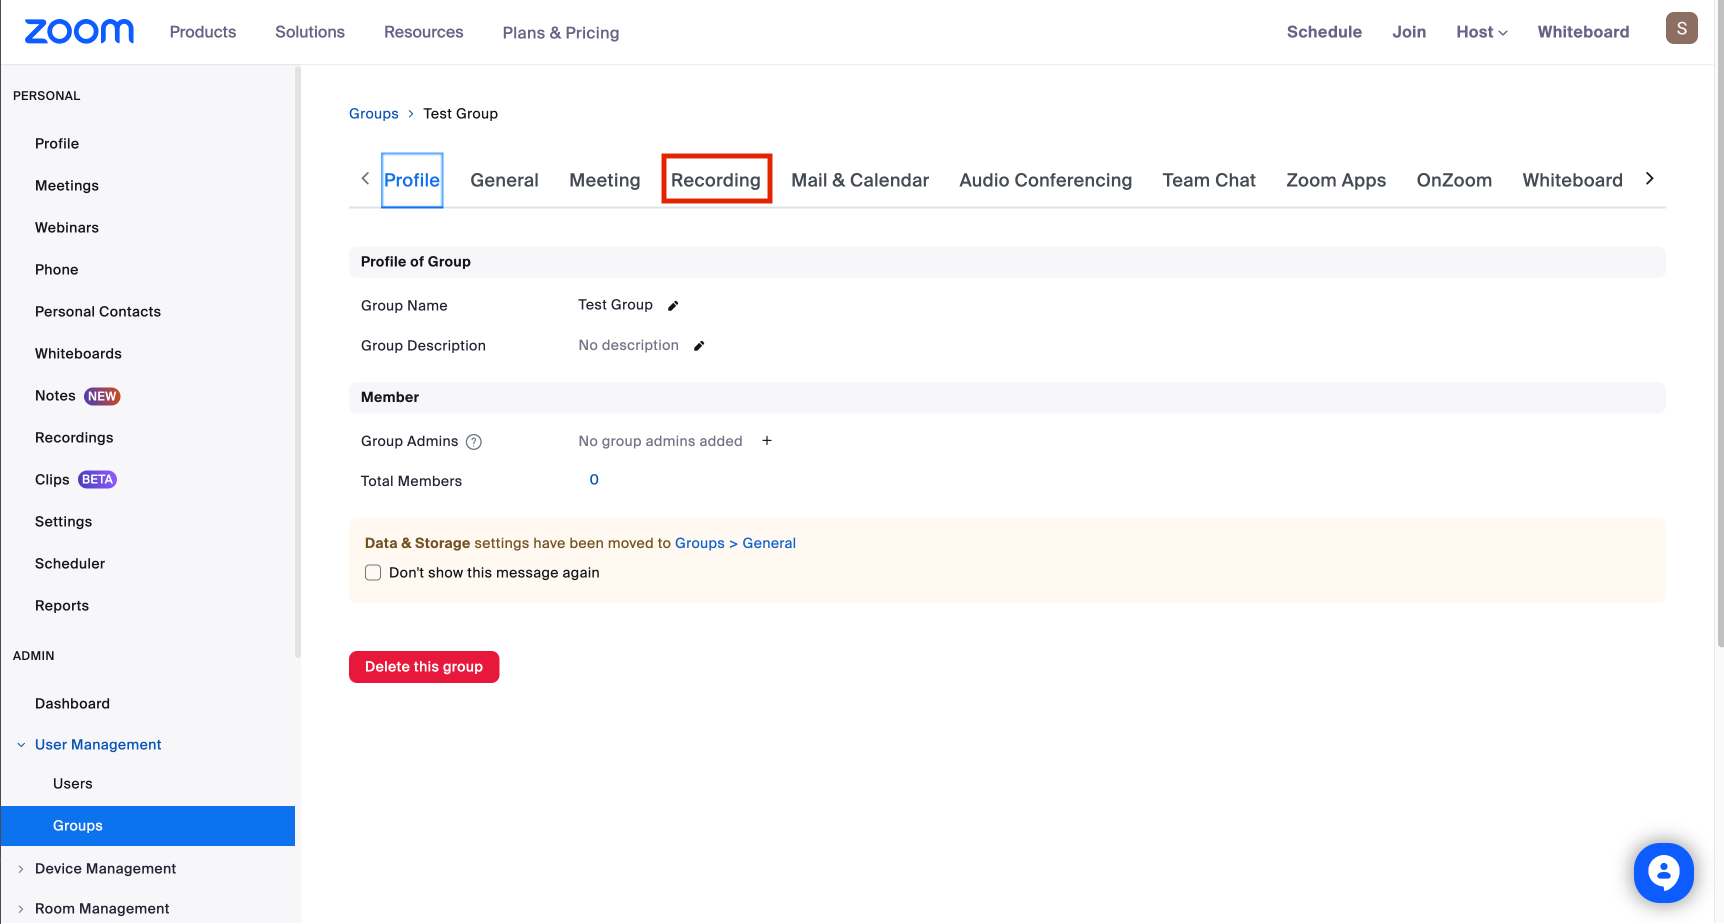
Open your new (or existing) group and go to the Recording tab.
-
Scroll to Cloud recording and switch it on. Enable Create audio transcript, lock that setting so users can’t disable it, and click Save.
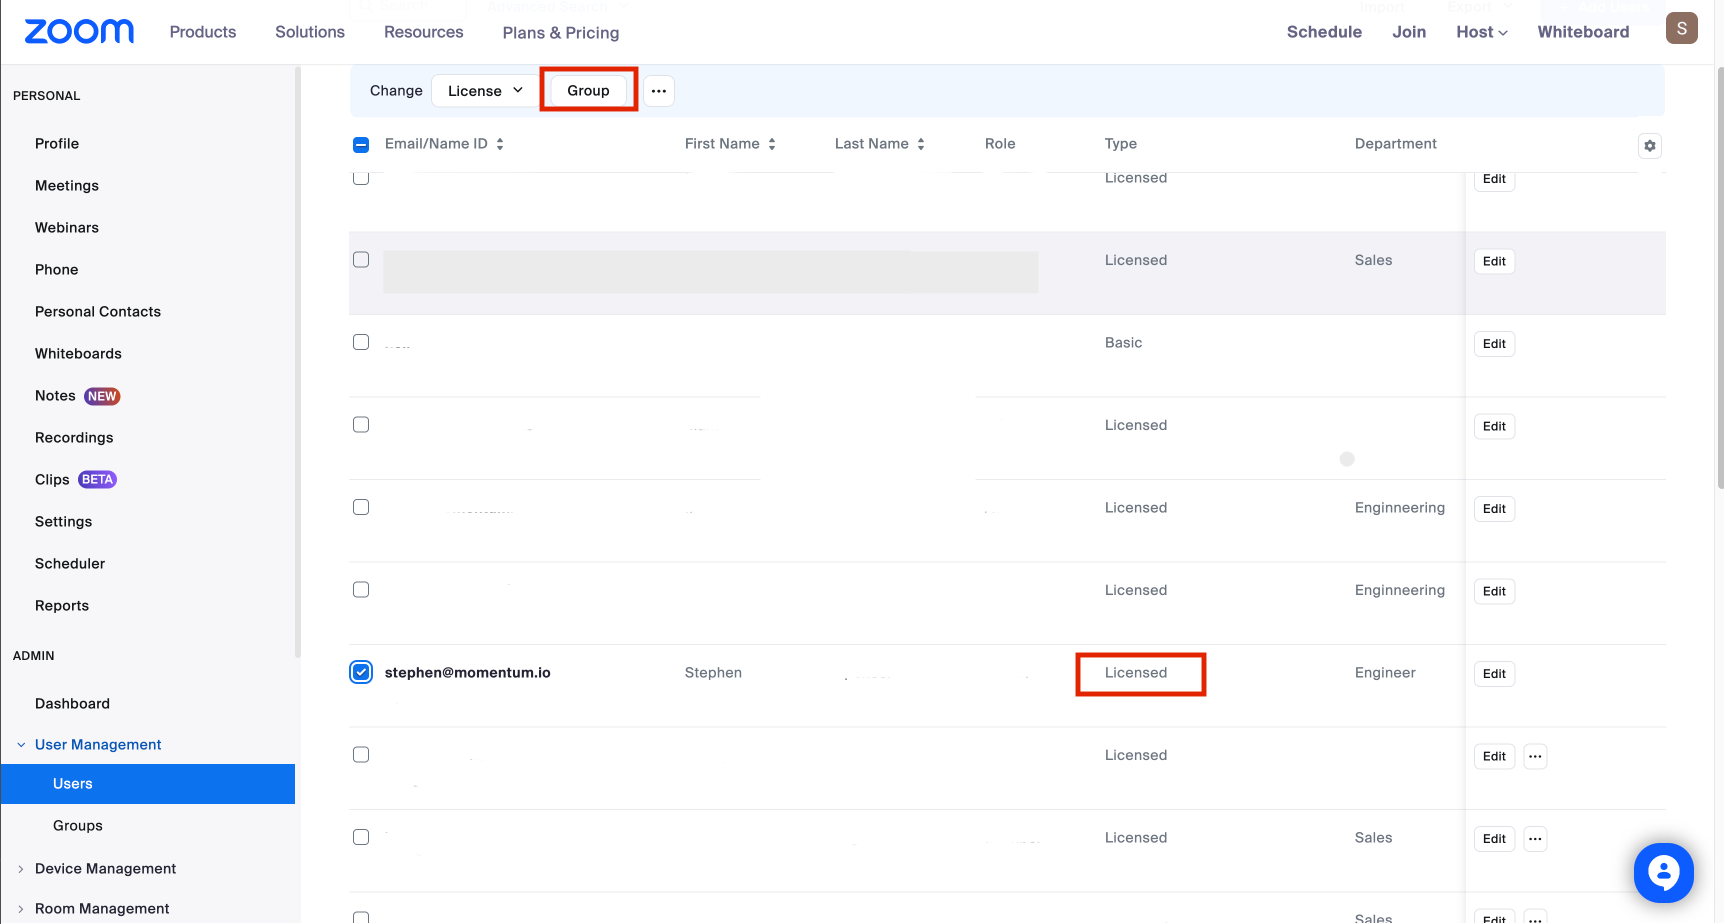
Add Licensed Users to the Group
-
Go back to User Management and select Users.
-
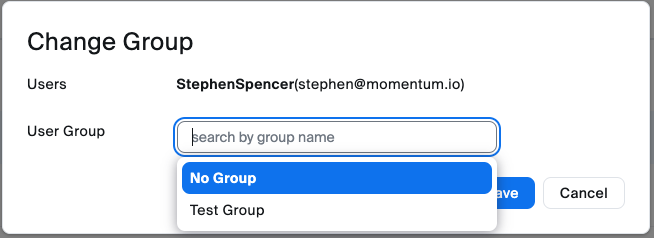
Check the box next to each licensed user whose calls should flow into Momentum, then click Group.
-
Pick the Zoom group you just configured and confirm with Save.