Autopilot Classic
Triggers after each call/email to analyze its content in real-time.
Retropilot
You are here. Triggers on a Salesforce event and analyzes all historical
conversations.
Autopilot Batch
Triggers manually to run on a large set of records that match your defined
criteria.
Setting Up Retropilot
Retropilot, part of the Autopilot Suite, allows you to trigger powerful AI extractions based on Salesforce events. Unlike the real-time Autopilot, Retropilot analyzes all historical conversational data within a specified timeframe to provide comprehensive insights right when a key moment occurs in your CRM.How Retropilot Works
Retropilot operates on a simple but powerful flow: a Salesforce event triggers an AI analysis of historical conversational data, which then results in an update to a Salesforce field.Use Cases for Retropilot
- New Opportunity Stage: When an opportunity moves to “Proposal,” automatically summarize all previous call notes related to budget and timeline.
- Account Ownership Change: When a new account owner is assigned, generate a summary of the customer’s key pain points and historical issues.
- Pre-Renewal Analysis: 90 days before a renewal date, compile a list of all mentioned competitors and feature requests from the past year.
Step-by-Step Configuration
Step 1: Access the Retropilot Section
- Log in to your Momentum admin dashboard.
- Navigate to the Autopilot section and select the Retropilot tab.
- Click “New Retropilot Extraction” to begin.
Step 2: Define the Salesforce Trigger Event
This is the core of Retropilot. You’ll define the specific Salesforce event that initiates the extraction.In certain cases, you may instead need to configure an advanced self-managed
Salesforce Flow.
- Object: Select the Salesforce object (e.g., Opportunity, Account, Case).
- Trigger Action:
On Create: Runs when a new record of the selected object is created.On Update: Runs when a record is modified.On Create & Update: Runs for both creation and modification.
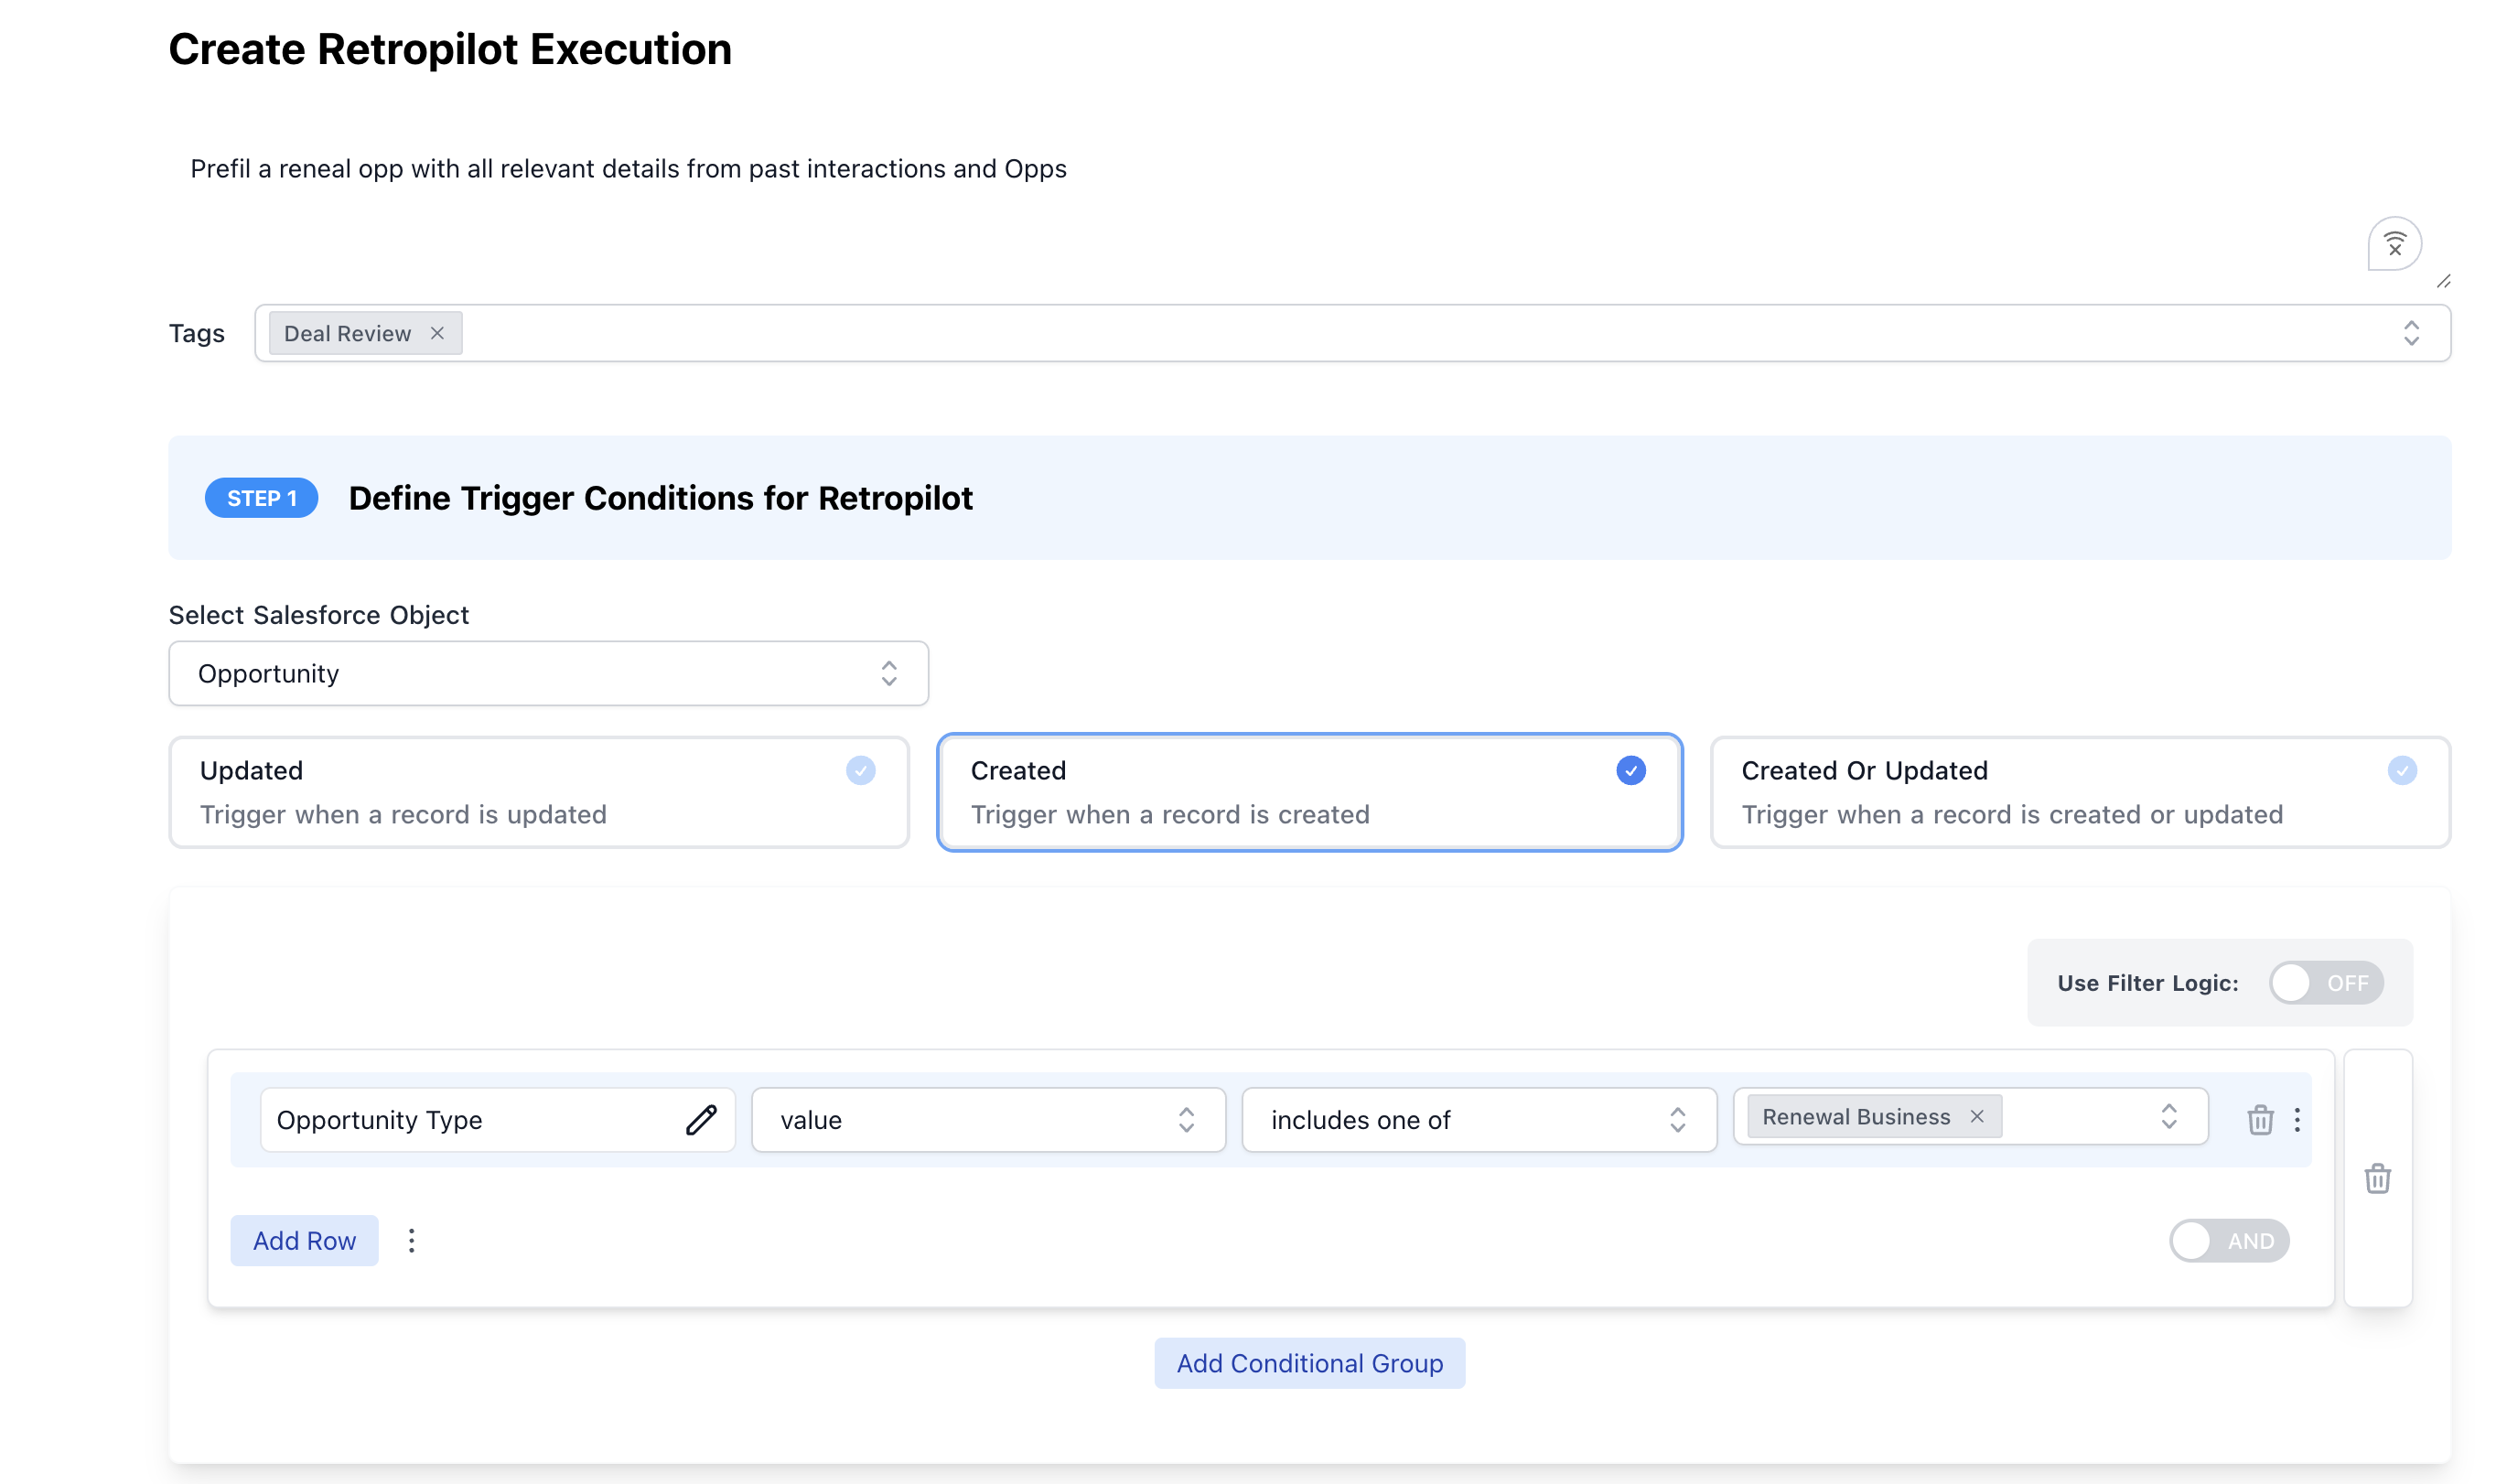
On Update.
- Field: Choose the field to monitor (e.g.,
StageName,OwnerId). - Condition:
Changes to: Triggers only when the field’s value changes to a specific value (e.g., StageName changes to “Closed Won”). This is the recommended and most precise way to control triggers.Is: Triggers if the field has a certain value after the update. Use with caution as this can fire on unrelated record updates.
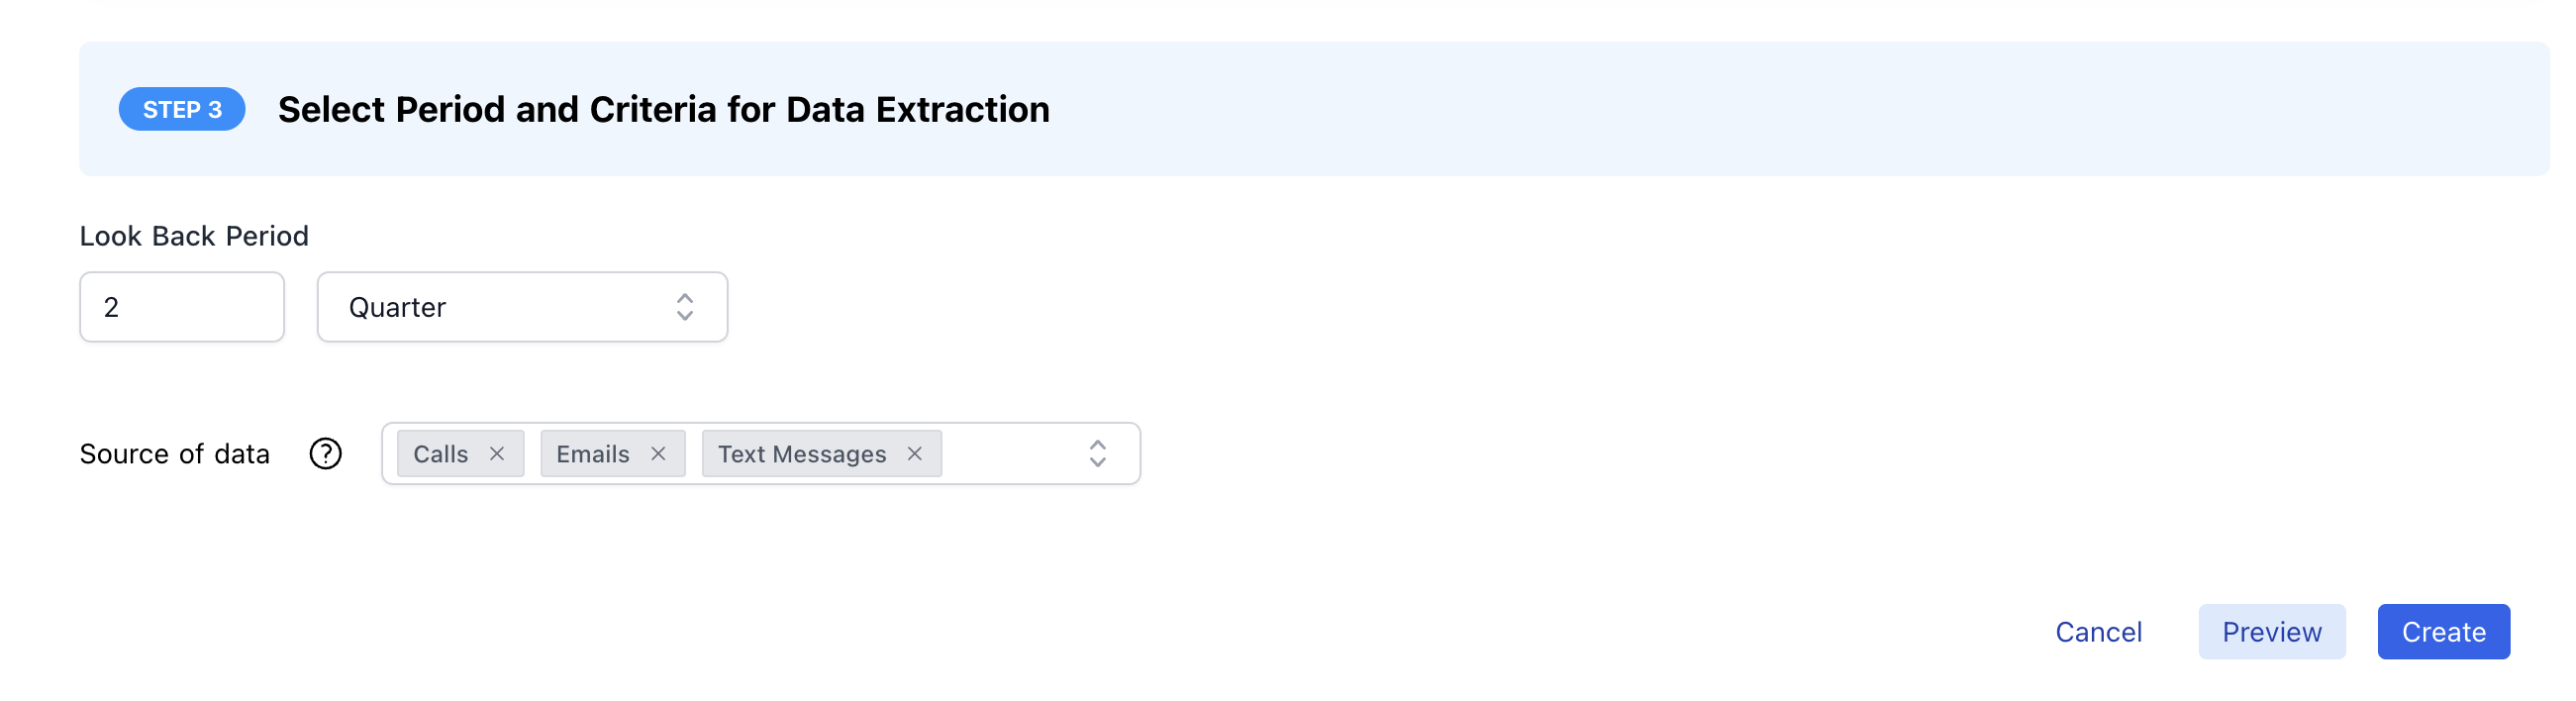
Step 3: Set the Time Window
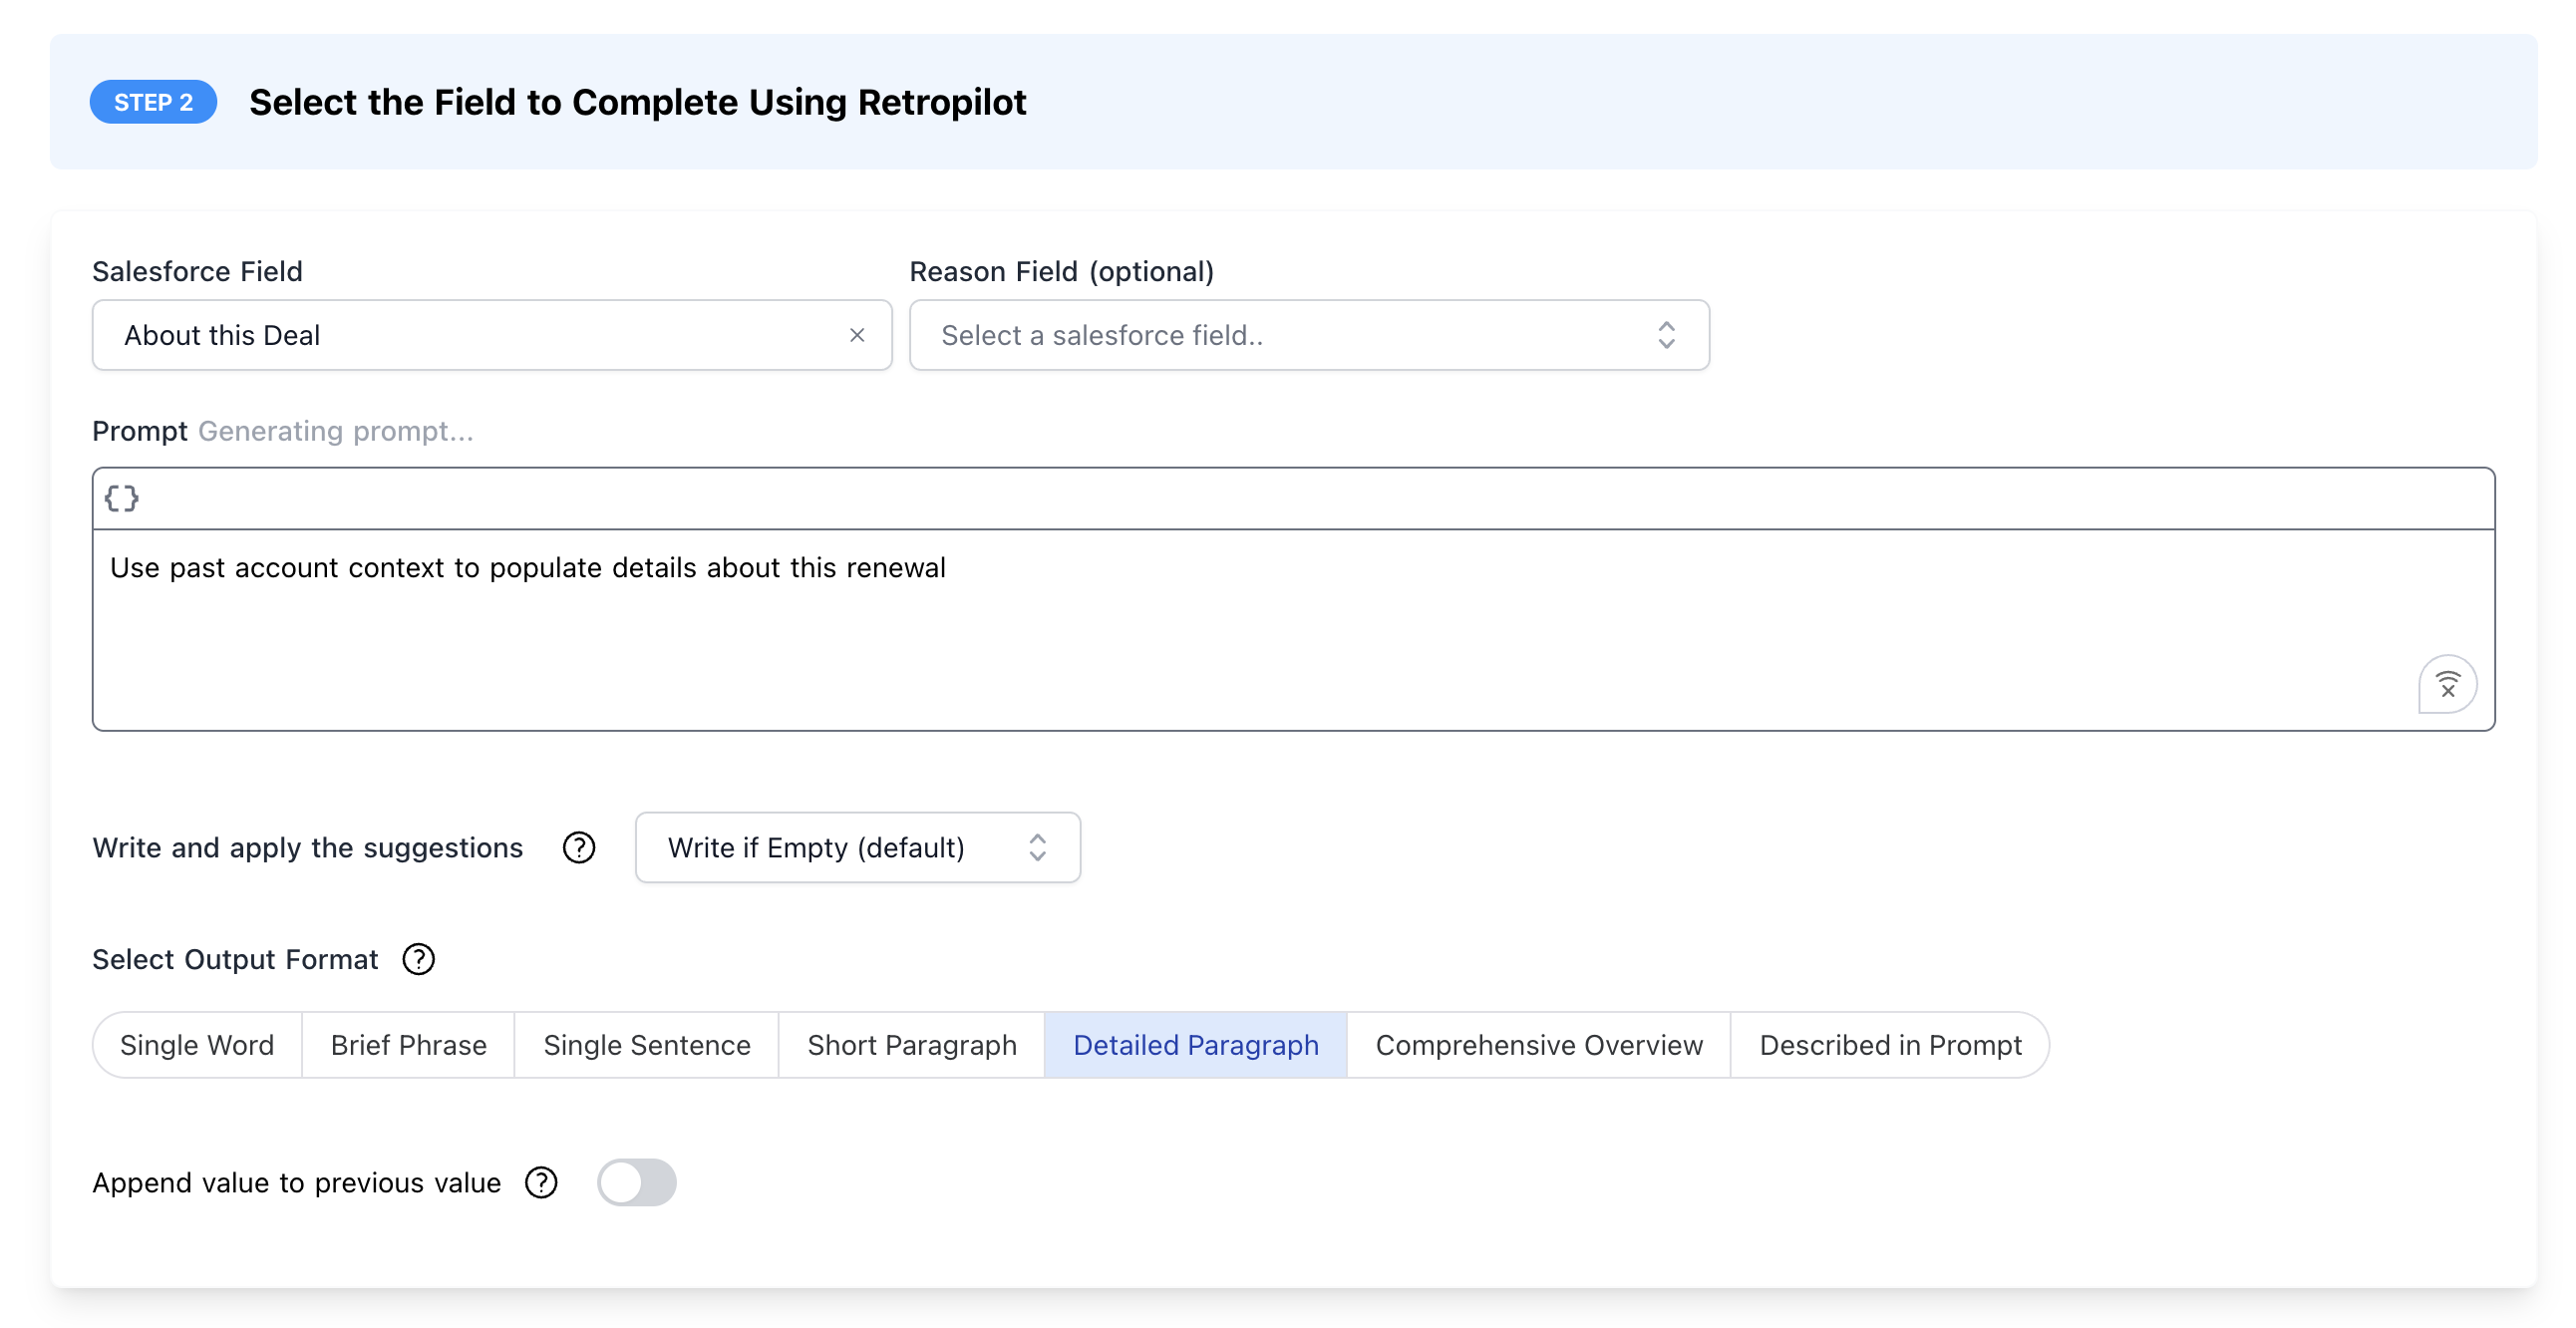
Define the period of historical conversational data that Retropilot should analyze. This can be anything from the last 7 days to the entire history of the record.Step 4: Write Your AI Prompt
This prompt will guide the AI in its analysis of the historical conversational data. Make sure your prompt is clear about what you want summarized or extracted. Example Prompts:- For a “Negotiation” Stage Trigger:
- For a “New Owner” Trigger:
Step 5: Configure Save Behavior
Choose how the extracted data is saved to Salesforce, just like a regular Autopilot extraction.- Confirm to Write: Requires manual approval in Slack.
- Write if Empty: Only writes if the target field is blank.
- Automatic Write: Always writes the new value.
- Skip: Nothing will be written to Salesforce (default behavior)
- Write Reason: Write a message explaining why no data could be extracted
- Custom Text: Write custom text that you specify
This setting still respects your save behavior configuration. Confirm to
Write, Write if Empty, and Automatic Write settings will still apply.
Retropilot automatically truncates extracted values to fit the target field’s
maximum length in Salesforce.
Step 6: Test and Activate
- Preview: Test your Retropilot configuration against existing Salesforce records that meet your trigger criteria to see what the output would look like.
- Activate: Once you’re confident, activate the Retropilot rule to have it run automatically based on your trigger.